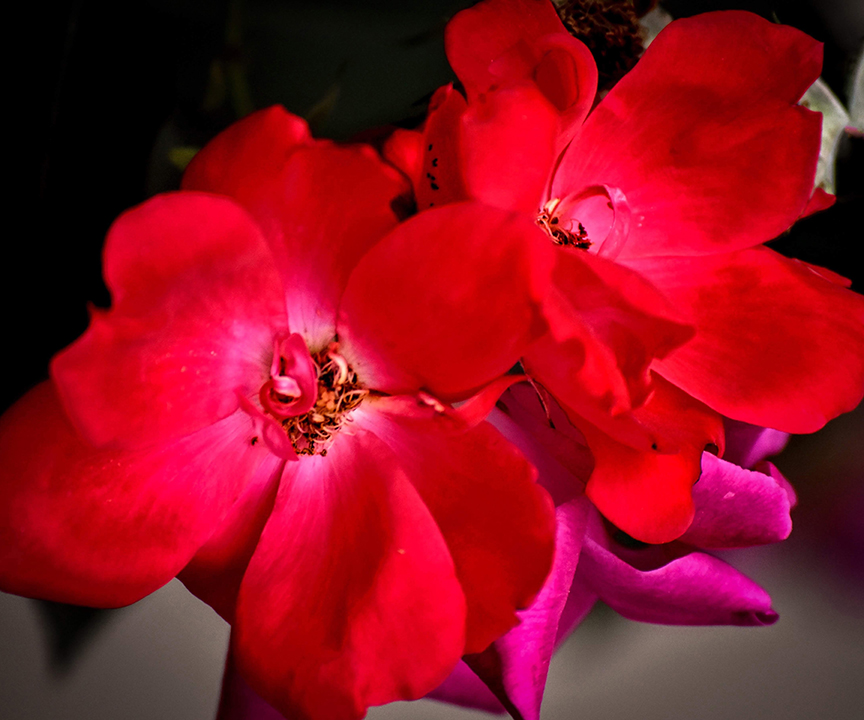
Outdoor Macro Photography – April Rain Bring Great Spring Photographs
Macro photography is often thought of for close up product in a studio controlled setting. However, macro photography also extends to the outdoors, and it’s subject is generally floral. It’s that time of the year when they say that April rain brings spring flowers. What it also brings is a beautiful time of year to be outdoors creating unique images of the new budding flowers.
First and most important is to choose a day when there is little to no wind.
Unfortunately most other conditions are detrimental.
The following are a few tips to help you create some amazing images.

(c)2018 Diane Gossett
What to pack in your case:
Pack a shower curtain (buy a cheap one at Walmart for $5). You will need this to keep dry if the ground is damp.
- A mini or an ultra-compact tripod (ProMaster xc522)
- ProMaster Clamper or Clamper Jr
- Your camera(s) of preference
- A macro lens is preferable; a fixed/prime lens like a 60mm 2.8 or a 100mm 2.8.
- A multi focal-length lens such as a 70-200mm that is 2.8 throughout,
- A wireless/IR remote to prevent camera shake.
- Filters
- Circular Polarizing Filters
- ND Filters such as an ND1 or ND2
- Your imagination
- Canteen filled with your favorite warm drink
Getting Started
If you are new to photography and this is your first adventure you will want toyou’re your camera to Aperture priority; this will allow you to shoot wide open and will ask the camera to be a light meter and figure a shutter speed for your situations. If the shutter speed is too slow, there is no need to worry; simply change your ISO to make the image sensor more sensitive to light. Example, if you set your aperture to 2.8 and your ISO is 200 and the camera’s internal meter is adjusting the shutter speed to 1/8th of a second you can change the ISO to 400 and the shutter speed will increase to 1/15th of a second.
When you start you will want to set your ISO as low as you can. ISO 100 is typically a camera’s natural ISO, so begin there and adjust the setting as conditions allow. Just a quick reminder the lower the ISO the less chance “digital noise” will occur. If there is no wind ISO 100 or 200 will work just fine, but once you start shooting even with a slight breeze you will need to increase your ISO setting, to ISO 400. So you can shoot at a faster shutter speed to minimize movement. You can also use a translucent reflector as a wind blocker. Since most images will be shot with a longer exposure you may want to consider using mirror lock-up, that is if your camera has it. With long shutter speeds the shutter opening and closing will cause camera shake giving you a blurred image.
Macro techniques
Once you find a subject without blemishes. It’s time to set up your camera. First things first, if the ground is damp or you just want to stay clean, lay your shower curtain on the ground and set your camera on your tripod and begin to compose your image.
When you are happy with your composition carefully focus on the part of the subject you want crisp; keep in mind the point you focus on is 1/3rd into your depth of field (what’s in focus) 1/3rd in front of your focus point and 2/3rd behind your focus point.. Vary the point you focus on to experiment what works best.
Now it’s time to start experimenting with camera settings. You can play with the aperture until you have dialed an exposure that suits your fancy. Personally I would choose a setting somewhere between 2.8 and f5.6. I prefer to shoot wide open (f2.8) so the background goes entirely soft. Once you have a lock on your focus you can experiment with your exposure. As mentioned above you can now try to increase and decrease your aperture setting and bracketing your shots of the same subject ensuring you a variety of images to choose from when you are at home enjoying your work!

Comments
Outdoor Macro Photography – April Rain Bring Great Spring Photographs — No Comments